Nespresso Milk Frother: How It Works
A very hard ceramic coats the interiors of your Nespresso Aeroccino. It has six parts: the bowl, heater, post, electric button, plastic lid, and base. Unless you accidentally burn milk on the surface, cleaning your frother is quite an easy task.
The base has a built-in on and off switch. The power-on light lets you know if the machine is on or not. There is also a storage compartment for one whisk.
Users only need to put the bowl on the heater and mount the whisk on the post. The transparent plastic lid has a removable rubber seal to keep the milk from flying everywhere while you whisk.
There are two whisks supplied in every Nespresso Aeroccino milk frother the plain whisk and the spiral whisk. When using the plain whisk, dont exceed above the top maximum level mark. When using the spiral whisk, dont exceed the bottom level mark. The spiral whisk is perfect if you are after more froth.
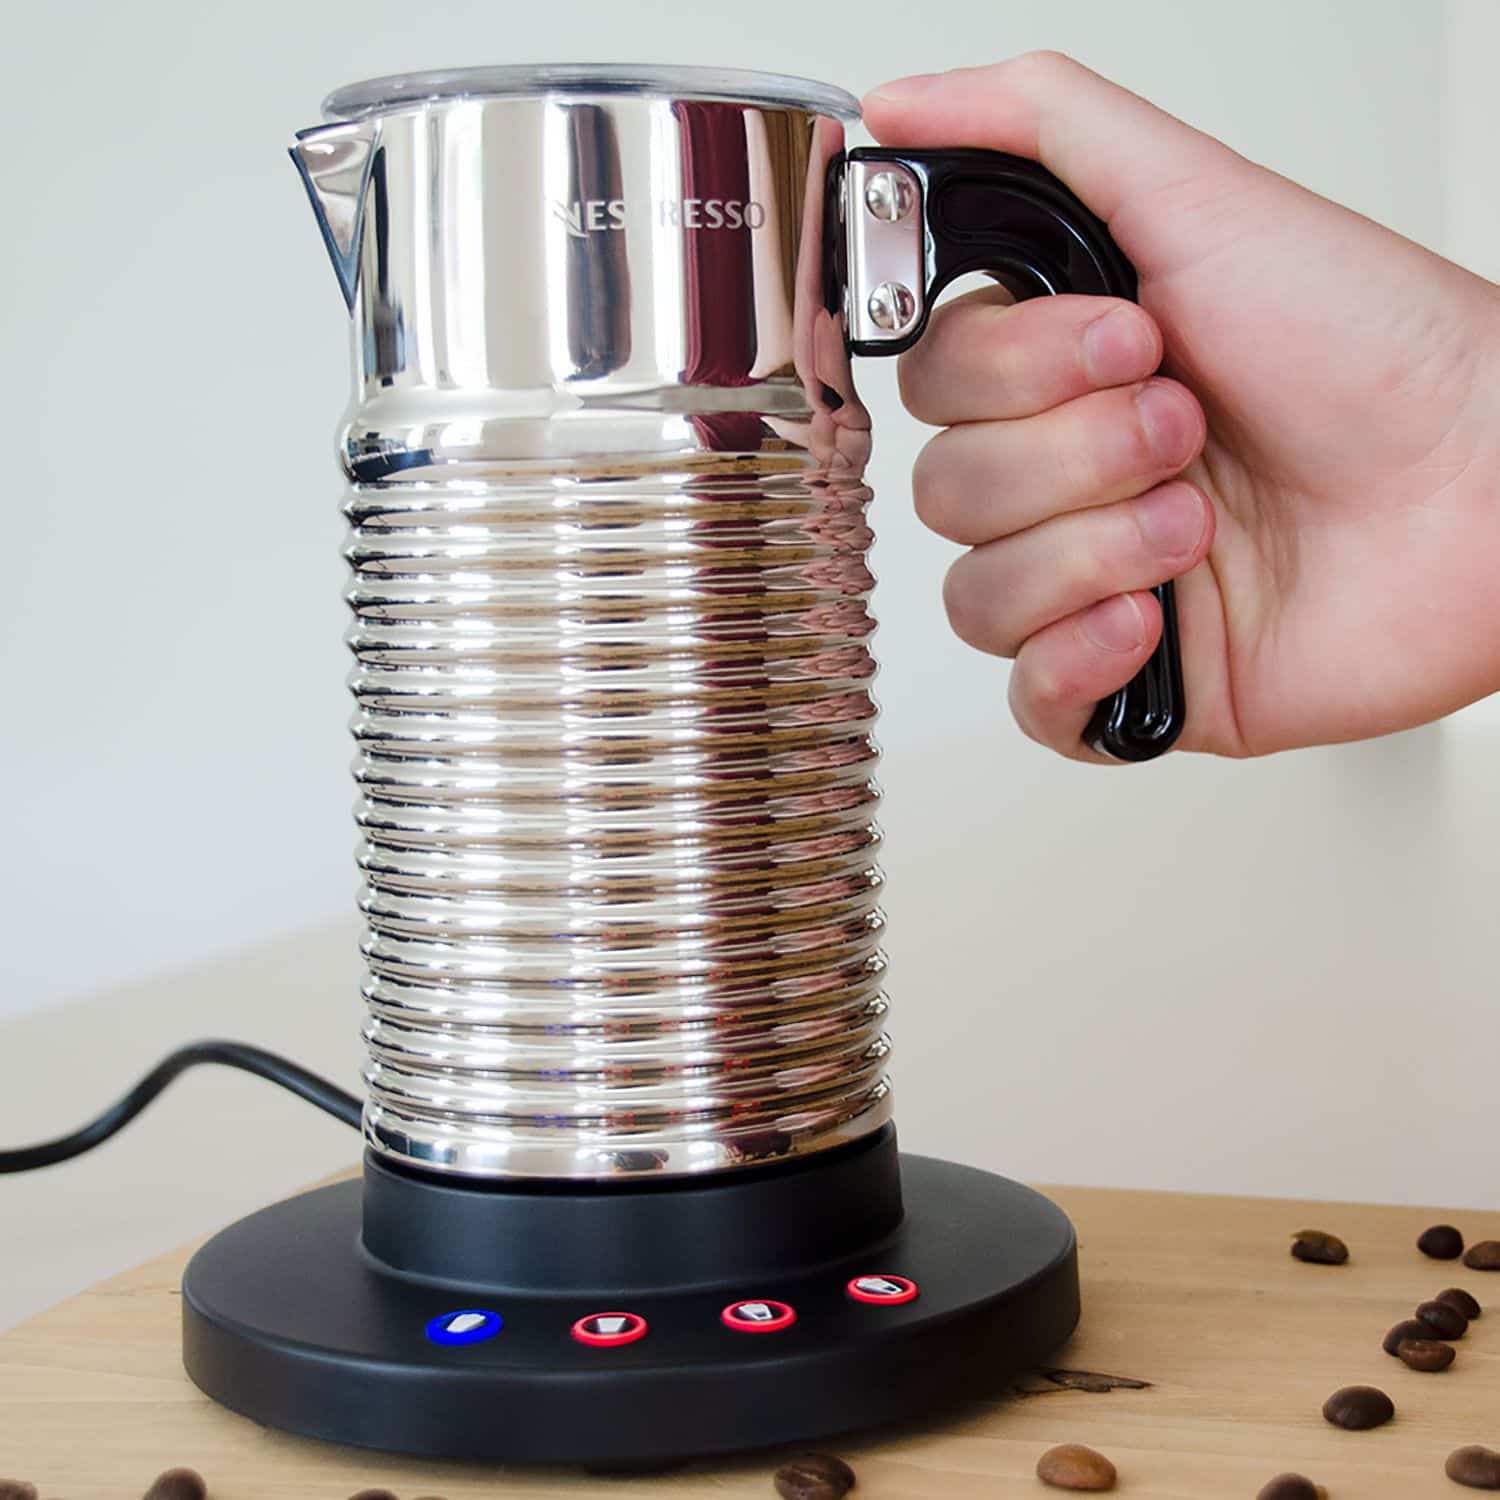
If you intend to only froth milk without heating, press the button on the side of the machine until it turns blue. The frother will then automatically switch off once done.
When you need to heat and froth milk, quickly press the button. This will make the button turn red. The machine will shut down once the milk is frothed and is hot enough.
How To Use Nespresso Aeroccino Plus
- Place the whisk inside the frother and fix it on its base.
- Fill the jug/frother with fresh milk to the maximum level.
- Fix the lid, press the button one time for warm milk froth and press the button for two seconds for cold froth.
- The Aeroccino plus frother will deliver the perfect and smooth hot or cold froth in 70 seconds.
- After the frothing process, the unit stops automatically.
- For more detail, watch the below video.
Cold Frothing And Warm Milk
It is an additional feature of the Nespresso aeroccino. Along with creating warm foam, it can whip cold foam as well. All you need to do is, instead of pressing the button quickly, you have to hold it down.
A blue light will appear instead of red light, indicating that the milk frother is frothing cold foam instead of warm foam.
One thing that should be kept in mind is that creating foam takes more space inside the frother, so when you are up to only heating milk, the capacity increases.
Read Also: Where To Roast Coffee Beans
Why Is My Nespresso Milk Frother Flashing Red
If traces of milk are left inside the Aeroccino, it will cause it to heat up faster than intended and stop heating and spinning earlier. This will result in the button flashing red. We recommend cleaning your Aeroccino thoroughly with cool water and a Teflon-approved or non-stick scourer after every use.
Your Coffee Machine May Get Too Hot

The biggest disadvantage of using a Nespresso machine frother is that it can cause your coffee maker to get too hot which can result in damage to the machine itself or even damage to your home if it is not properly ventilated. Therefore, make sure that you take extra care when using a frothing nozzle and that you dont overheat your coffee maker by making it too hot.
You May Like: Where To Buy Keurig Coffee Makers
Nespressos Latest Premium Coffee
This brings to mind Nespressos latest premium coffee machine, the Nespresso Lattissima Touch Original Espresso Machine with Milk Frother by DeLonghi. This is the 2019 version of the 2015 populated version of the Nespresso Lattissima One by DeLonghi.
The new design has veered away from the more contemporary design of the Vertuo, which during the early and mid-2010s was popular.
However, with retro once again being the in-thing, the Nespresso Lattissima Touch Original Espresso Machine with Milk Frother by DeLonghi is also in.
The latest model retains the signature retro design, as it has been designed for the 2020s, with its compact look and monochromatic colourway, with either the washed black, grey or white colours available.
The design also speaks to its popularity, as it features a sliding drip tray for different cup or glass sizes, removable milk container with rinsing function, illuminated buttons.
It also has an advanced milk frother by delonghi, with an automatic frother that creates rich, long-lasting, creamy foam.
is currently selling the coffee and espresso machine for $396.75 from the original price of $479.95.
|
Where to buy the Nespresso Lattissima Touch Espresso Machine with Milk Frother by DeLonghi? |
Technical Characteristics Of Nespresso Aeroccino
The Nespresso mixer is already in its fourth version, the Aeroccino 4, although the best-selling machine at the time of writing is still the much loved Aeroccino 3, which, for its widespread availability I will cover in this article.
The Nespresso Aeroccino 3 is an efficient, useful, and practical machine for frothing milk . With user friendly ridges for an easy and safer grip, this milk frother grows on you as a silent and effective accessory to create froth easily and quickly, without complications.
This hot milk frother measures of 9 x 9 x 17 cm and has a weight of 449 grams. In other words, it is a small and light product, so it can be transported and stored while traveling and shouldnt be a burden taking up too much space in the kitchen. However it is not battery operated so its not as portable as smaller handheld frothers. The base of this product is the handy mixer storage space.
The maximum froth capacity that it is capable of making is 120 ml/ 4oz, while the maximum capacity for hot milk is 240 ml/8oz, which is easily be enough for three cappuccinos.
A customer who gave it 5 stars said, Its design is really novel and striking, like an accessory from a 60s Italian bistro. In a few seconds, this foamer will allow you to get whipped, creamy, and consistent milk.
Read Also: How To Make Caramel Brulee Latte
Nespresso Milk Frother Instructions: Step
As Nespresso is an electrical gadget, it requires electric power to build the system. You do not have to spend too much time on Nespresso, as it provides a quick working activity.
Before initiating the process, ensure that you have an appropriate and high-quality nespresso machine. In addition, you should place it near the electrical cord so that it can easily be attached to the electrical socket.
In addition to this, it performs most of the operational activities on its own. Thus it is considered to be the best alternative to the manual options. It contains a simple three processes for your help the steps are provided below.
Step1 First, you have to put the milk in the frother. You can use any choice, even ordinary and flavored milk. At the same time, these flavored and nondairy options of a mil are not that suitable for giving you a foaming result.
For this step, the experts recommend Full-fat milk because it provides enough foam to you over the milk. However, those conscious of the gain of calories might go for the pic of low-fat milk.
After the choice of milk, add up into the frother material. Fill it thoroughly until it reaches the canister.
The canister, on average, has the capacity of around two lattes to three. After that, adjust the lid and place the canister over the Nespresso frother machine. Make sure that you are following all the espressos directions.
You will end up with the perfect taste, quality, and service.
Also Read: How To Adjust Nespresso Pods Size
It Takes Up Counter Space
Another disadvantage of using a Nespresso machine frother is that it takes up more space than just brewing coffee without one. This means that you will have to leave extra space on the countertop for your Nespresso machine and its accessories so that they can be placed on top of it while they are being used. This will require you to make sure that your kitchen or home is big enough for this because otherwise, you may find yourself having to move things around once or twice in order to allow room for the rest of the equipment and accessories required in order for this espresso machine with a frothing nozzle to be used properly.
Don’t Miss: Why Is Single Origin Coffee Better
How Does The Nespresso Milk Frother Work
A Nespresso milk frother is an easy-to-use machine that works with one button. It has a canister, whisk, and different heating options available. You can easily learn how to use Nespresso frother to get your desired coffee in a few seconds.
You have to add the milk according to the indicator limit and press the start button. The canister will display a red line, and you get your favorite fancy latte and cappuccino.
How To Use Nespresso Frother
Nespresso frothers are a handy tool that let you make hot and cold milk foam in a matter of seconds. But if you arent familiar with Nespresso milk frothers, you might not know how to use them properly.
Luckily, were here to help! In this handy guide, well teach you how to use a Nespresso milk frother to make perfectly foamed milk in just a few easy steps!
So lets get started, shall we?
Don’t Miss: Commercial Cold Brew Coffee Maker
How To Prevent Nespresso Aeroccino Milk Frother From Leaking Overflowing & Spilling Over
Many new owners of the Nespresso Aeroccino milk frother run into a problem where milk is overflowing, leaking or spilling out from the lid at top of the jug. If that is why you are here, the good news is that there is nothing wrong with your frother. You can avoid this happening again just be learning a few simple things about how to use the Aeroccino correctly. Keep reading to learn more.
How To Use A Nespresso Aeroccino 3

The Aeroccino 3 is a commonly used model as well. They often sell it as part of a bundle with most Vertuo and Original Nespresso machines.
The Aeroccino 3 is fast. It takes a little over a minute to froth milk and a little over two minutes to steam milk.
Don’t Miss: How Much Caffeine In Folgers 1 2 Caff
Instructions To Reset Nespresso Aeroccino Plus
Aeroccino Plus has only one button for the entire operation. You have to modify the whisk for frothing or steaming. If you want to prepare only warm milk, remove the frothing spring from the whisk, and if you want to prepare milk froth, place the whisk along with the frothing spring. It gives a perfect smooth froth with high-fat milk , refrigerated, low fat, oat, almond, skim, and soy milk. The milk froth preparation steps include
- Place the whisk underside of the frother and fix it on its base.
- Add the cold milk up to the maximum level.
- Place its lid, press the button one time for steamed milk/hot froth and press the button for two seconds for cold milk froth.
- The Aeroccino plus frother will deliver the perfect hot or cold froth in 70-80 seconds.
- Once the frothing process completes, the unit automatically shuts off.
- For more detail, watch the below video.
Nespresso Aeroccino Milk Frother Review
For many of us on the Home Grounds team, nothing quite hits the spot like a velvety, creamy cappuccino. Along with fresh coffee beans, a quality grinder, an espresso machine, and milk, every delicious cappuccino needs a great milk frother. Enter the Nespresso Aeroccino milk frother.
What sets the Nespresso Aeroccino milk frother apart from the competition? Lets dive into the details in this Nespresso Aeroccino Milk Frother review.
Nespresso aeroccino Milk Frother Review
Read Also: How To Start Your Own Coffee Company
Is It The Same To Reset Nespresso Milk Frother With Original And Vertuo Nespresso Machines
Nespresso OriginalLine machines use powerful pressure pumps of 19-bars and extract perfect flavor and premium aromas from Nespresso capsules. OriginalLine models are compatible with OriginalLine Nespresso pods and third-party coffee capsules. These machines do not work well with Vertuo pods and are best for coffee lovers.
VertuoLine machines use Centrifusion technology, scan the capsules barcode, and run it vigorously at 7000 RPM. It results in a splendid and well-balanced espresso shot. VertuoLine models work well with Vertuo pods and Starbucks by Nespresso pods. They are best for those who drink coffee now and then.
Let me tell you how to use your OriginalLine or VertuoLine milk frothers.
How To Clean Nespresso Frother
The Aeroccino container is not dishwashing friendly, but it does feature a Teflon layer that enables it to be very straightforward to clean up and is immersible. Eliminate the stirrer and rinse it with fresh water while cleaning it with a towel or foam.
Eliminate the sealing from the top and wipe both with a similar method. Rinse the container with fresh water and wipe it down with a towel or foam to tidy it. A tiny bit of dishwashing liquid could get used however, wash it immediately and thoroughly.
Reattach the cover and place the agitators back in the jug after things seem to be dry. There is another magnetic hook on the bottom of the cover for storing. If you keep the secondary stirrer in the Aeroccino when operating it, it must also get wiped after being used.
Keeping the container on the foundation increases stress on the inductive process, reducing the lifespan of your Aeroccino. According to their Owners Guide, the container must not be on the foundation until youre utilizing it.
Utilizing your Aeroccino frother to produce coffee drinks, espresso, and macchiatos will provide you with fun as now you know about Nespresso frother how to use
You May Like: Does Family Dollar Sell Coffee Makers
Why Is My Nespresso Frother Not Frothing
Sometimes the steamer doesnt work because the machine is dirty. Try rinsing out the machinery and drying it off before using it again.
If its still not working, you may need to change the type of milk you use. Remember that low-fat, low-protein milk will often not froth or steam up as well as whole milk.
Nespresso Aeroccino 3 Vs : High
For a typical home barista, one of the most difficult things to achieve is a pitcher of properly textured frothed milk for your morning coffee. You need just the right technique, enough pressurized steam, and a frothing jug to create foam thatll pour well for latte art. And mastering that takes time, an espresso machine with a steam wand, and practice.
For those mornings when time is short and multitasking is a necessity, a good milk frother might be the easiest route from you to your cappuccino. Keep reading for Home Grounds review of the Nespresso Aeroccino milk frother and discover why it might be right for you.
Summary: The Nespresso Aeroccino Milk Frother 4
- Compact milk frother with an 8-ounce capacity.
- Creates customizable milk froth, steamed milk, and cold milk foam at a touch of a button.
- Works fast, producing hot froth in 80 seconds and steamed milk in less than 150 seconds.
Its heating coil is incredibly effective, it makes all this frothed foam, its super quiet, youre not gonna burn yourself, and its really, really easy to use.
Brian, Customer
Read Also: How Can I Get Energy Without Caffeine
How To Make Cold Milk Froth With Nespresso Frother
Nespresso milk frothers give perfect cold froth in about a milk. It is easy to make cold froth with them. Place the whisk, add milk to the maximum level, and place the frother on its lid. Place its lid and press the button for two seconds or press the cold froth button . It will deliver you a splendid cold froth for your drinks and automatically shut off after the frothing process. Ensure to clean the device in a dishwasher after every use to keep it in a good position.
Types Of Milk Frothing By Nespresso Aeroccino 3 Frother

Nespresso Aeroccino 3 offers two different types of milk frothing options. These are cold milk frothing and warm milk frothing. Both coffee machines are beautiful in their design and provide a wonderful coffee experience that satisfies all the cravings of a coffee addict. Types of milk frothing by Nespresso frother are as below.
Also Check: Is Decaf Coffee Good For Kidneys
Cleaning An Aeroccino Plus
Unfortunately, the jug is not dishwasher safe. However, it has a non-stick coating, making it easy to clean and safe to immerse in water.
Take the agitator off and rinse it with water. You should also wipe it down with a dishrag or sponge. Similarly, you should take the seal off of the lid and clean both the lid and the seal in the same way.
You can use a small amount of dish detergent to clean the jug, but be sure to rinse it well so that there is no residual dish soap taste the next time you use it.
Even if you do not have time to wash your Aeroccino Plus immediately after using it, be sure to at least give it a quick rinse once you are done. This will make it easier to clean when the time comes.
Once all of the pieces are dry, reattach the lid and seal. You can store the agitators in the jug. Consider storing the jug beside the base, as opposed to on it. If you keep the jug on the base, there will be extra wear on the induction mechanism, which can negatively affect the lifespan of your Aeroccino Plus . Only attach the jug to the base when you are using the machine.